Showing posts with label Yoga Asana. Show all posts

Tuesday, April 1, 2008

Learn Nauli Kriya online

Nauli Kriya is intended for regenerating, invigorating and stimulating the abdominal viscera and the gastro-intestinal or alimentary system. For the practice of Nauli you should know the Uddiyana Bandha. Uddiyana can be done even in a sitting posture; but Nauli is generally done while standing.

Technique :-

Stand erect at your place.

Maintain 15" to 18" distance between legs and lean forward, place hands on respective knees or thighs. Exhale completely and retain the breath outside.

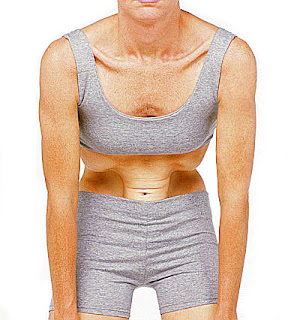
Expand your chest and raise your diaphragm so that abdomen is drawn in and there becomes a cavity in abdomen.

Middle Nauli: Now try to isolate the central abdminal muscle (recti). This cannot be achieved during first effort. But effort should continue. Blow out your abdomen as in Agnisara but effort should be made that central part should come out. This is called Madhyama (middle) Nauli. After maintaining it according to your limitation, return to the original position and then practise it again.

Left Nauli:After attaining Middle Nauli, when we press more on left knee with left hand and lessen the pressure on right knee of right hand then the Middle Nauli shifts to left side and this is known as (Vama) left nauli.

Right Nauli:Similarly when we lessen the pressure of the left hand on left knee then this accumulated muscles (of middle nauli) shifts to right side and this is called right nauli.

Benefits and Limitations :-
See Uddiyana.
Agnisara makes the appetite normal, keeps digestive system healthy, lever becomes strong and keeps health diseaseless
All the benefits of Uddiyana can be achieved.
If having high blood-pressure, practice it very slowly without giving much pressure.


How to do alandhara Bandha? See Online

Contracting the throat, the chin should be firmly placed on the chest. This is known as Jalandhara Bandha. The destroyer (greatest enemy) of old age and (premature death).

How to practice Jalandhara bandha
Drop the head slightly so that you can tuck the chin in close to the chest. This will help to engage the neck muscles and control the flow of air through the respiratory passages.
With the chin in this position, the tongue pushes up against the palate in the mouth.

Benefits of Jalandhara bandha

This position helps to control the vaccum for breath that the lungs produce naturally. Thus, leading to greater control of the breath in pranayama exercises.
This bandha also supports the neck, shifts the focus slighly inward, and allows the yogi to seal the energy at the top of the body (while Mula bandha seals the energy at the bottom.
Similar to Uddiyana bandha, engaging Jalandhara will help to gain power and focus in certain postures.

Learn Vrksasana Online ,Read Step by Step


The literal meaning of Vrksasana is tree pose in Sanskrit

Introduction: It can be challenging to stand on one leg and to do so build a better sense of balance. Focus and concentration are required. Imagining tree roots going down from your foot can ground you and provide stability. As you do the pose, look at a real tree standing in nature if you can. In this pose, you are rooted as trees are, yet you are reaching up with your torso toward the illuminating brilliance of the sun. You can imagine sustenance from the earth coming upwards and at the same time bring in the energy of the sun from above into your body.
Vrksasana is a basic yoga pose and looks deceptively simple and yet provides a challenge, mostly in trying to not fall over. When a person feels shaky, doing the tree pose can make them feel more steady and grounded. As you root down to the ground

Technique :-
Stand erect with legs together, hands by the side of thigh, gaze in front.
Fold your right leg at the knee and place the sole near the left thigh joint.
Bring both the hands in Namaskara Mudra.
After maintaining it for some time, release your hands and stand on both the feet.
Now practise similarly from the other leg. This completes one round of Vrikshasana.

Benefits:Strengthens the quadriceps muscles, thighs, calves, ankles and spine.Creates flexibility in the hips.The spine elongates.Stretches the groins and inner thighs, chest and shoulders.Alleviates sciatica. Reduces flat feet.Cultivates balance.


Learn Uddiyana Bandha Asana Online

Uddiyana bandha can be practiced alone or in conjunction with mula bandha. To engage this bandha, sit in a comfortable cross legged position. Exhale your breath, then take a false inhale (draw the abdomen in and up without taking in any breath.) Draw the belly up underneath the rib cage. To release, soften the abdomen and inhale.

Uddiyana bandha tones, massages and cleans the abdominal organs. If you are familiar with mula bandha, you will see that the drawing up of the pelvic floor naturally leads into the drawing up of the abdomen. This is how the bandhas work together.

This Bandha can be practiced both in standing posture and in sitting posture. We will see it in standing posture.

Steps Inhale deeply by pushing your abdomen forwards, and then exhaling forcibly, empty your lungs.Contract the belly, pulling the navel and intestine towards your back. In this process diaphragm is pushed up and the wall of the belly pulled upward.This Bandha is practices at the end of Kumbhaka (retention of breath) and beginning of Rechaka (exhalation of breath).

Benefits
Uddiyana Bandha massages the internal organs in the abdominal area, the heart.This massaging of abdominal area improves digestive system, relieves constipation, gas, indigestion and liver trouble, tones up the nerves in the solar plexus region, reduces abdominal fat and strengthens the abdominal muscles. It also has curative and corrective effects on the adrenal glands and sex glands.And the massaging of the heart makes it a stronger, more efficient improving the blood circulation. Regular practice of Uddiyana Bandha makes you young forever.This Bandha is extremely helpful in following celibate. This Bandha awakens the Kundalini power.


Monday, March 31, 2008

How to do Salabha asana? Learn Online

SALABHA ASANA (THE LOCUST POSTURE)


Salabha Asana is a reverse posture to the Cobra Posture, which gives a backward bend to the spine. Values of certain asanas are maximised when done one after the other. Cobra posture activates the upper area while locust activates the lower waist down area of the body. So this asana gives maximum benefit when done after the cobra posture

Since full-locust is strenuous, it is better for the beginners to practice the half-locust posture before attempting the full-locust.

How to do :

Lie face down on the floor on your stomach, hands stretched backwards close to the body and the legs straight. Making fists of the hands bring them together beneath the thighs with the wrists touching.

Inhale as much air as you can. Holding your breath make your head straight and put the chin on the floor (on a folded blanket or towel). Tighten both the legs and lift them up as high as you can. Do not bend the knees.

Remain in the same posture for a few seconds.

Exhale and simultaneously lower the legs slowly to the floor. Do not drop the legs. By the time the legs touch the floor you should finish exhaling. You have completed one round of a most strenuous posture. Relax.


Parvatasana mountain posture

The body is stretched to look like a mountain peak and so it is called the Parvatasana (parvat means mountain in Sanskrit).

Steps by Steps
Relax the body and bring the hands as in position 1 in figure above.
Take the position as in Padmasana.
Straighten the left leg in the knee then straighten right leg.
Get both the legs together, take the sitting posture.

Benefits and Limitations:-
This makes spine flexible.
Visceroptosis and pain in backbone is removed.
It is beneficial in constipation and removes seminal weakness.
Those having complaints of reeling sensation should not practise it.


Learn Yogamudra Asana Online

This Asana differs from the earlier one only in the position of hands. However, this latter variety is more difficult than the former. Besides, it is a more advanced state and naturally more beneficial. One should first practice type 1 and then pass on to type 2.


Technique :-
Sit in Padmasana.
Take both hands towards your back and catch the wrist of one hand with the other. Keep neck straight.
Slowly start bending from your waist. Continue the bending till forehead touches the ground.
After maintaining it for some time raise your forehead and chest. Release your hands also and sit erect.


Benefits and Limitations:-
The internal organs of abdomen work efficiently as a result of its practice.
Connected nerves of navel become strong.
It is beneficial in constipation and removes seminal weakness.
Those suffering from hypertension or chronic headache should not practise it.


How to do Anuloma-Viloma Yoga Asana? See Step by Step


Yogic Breathing For Better Health. Swami Kuvalyanand once said, Yoga has a message for the human body, for the human mind and the human spirit.

Anuloma Viloma (Alternate Nostril breathing) or Nadi Shodhan (Without Retention or Kumbhaka) At any time, we only breath through one nostril, left nostril is active for about 90 minutes, and after that it changes to right nostril and it remains active for another 90 minutes. This is a healthy pattern. But due to imbalances in physical and mental energies, the rhythm is imbalanced. Yoga says that left nostril is IDA Nadi which represents mental energy and mind, and right nostril is Pingala Nadi, which represents physical energy and body. If there is imbalance between Ida and Pingala then body and mind are imbalanced.

The purpose of the alternate nostril breathing is to balance these 2 forces, the mental energy and physical energy, to bring harmony between Body and Mind.

Practice - Note (Practice of Anuloma - Viloma or Nadi Shodhan should be done with a Yoga Expert Only)

Begineers can start with deep breathing practice in sitting position (Padmasana - Lotus, Swastikasana- Auspicious, Vajrasana - Thunderbolt, Any Cross legged position in which the body can be relaxed and spine is erect.)

Pranav Mudra of right hand, will help close the right nostril while inhaling through left nostril and ring finger can close the left nostril while inhaling through right.

Initially 4 seconds inhale through left and exhale for 6 seconds through right nostril, then inhala through right for 4 seconds and exhale through left for 6 seconds can be practiced for about 5 minutes.

With practice one can increase the counts to 4:8, or 5:10 or 6:12 seconds

Benefits of Anuloma Viloma: Physical benefits

1. Anuloma Viloma cleanses and strengthens the lungs and entire respiratory system.

2.During retention, there is the highest rate of gaseous exchange in the lungs. Because of the increase in the pressure, more oxygen goes from the lungs into the blood and more CO2 (and other waste products) pass from the blood into the lungs for elimination during exhalation.

3.As exhalation is twice the time of inhalation, stale air and waste products are drained from the lugs.

Mental Psychic benefits

1.Anuloma Viloma helps to calm the mind, making it lucid and steady.

2.It makes the body light and the eyes shiny.

Precautions:

(1)Beginners should not try this exercise of breath retention rather they can try simple anuloma viloma without breath retension.

(2)It is strongly advised that these exercised should be learned with some experienced yoga teacher only


Learn Tolangulasana Yoga Asana Online ,Read Step by Step

This Asana balances the body like the balance, therefore, it is known by the name 'Tolangulasana'. This has come through tradition. In its final position the whole body is balanced on closed fists.
Technique :-
Sit in Padmasana.
Take support of the elbows to lie down on the back.
Lie down on the bank.
Raise the foot-lock slightly towards the stomach so that your buttocks may be raised. Place both the closed fists under the buttocks. Elbows should touch the ground.
Now raise foot-lock as well as head and back and balance your whole body on the fists. (Elbows should be up from the around).
While retrurning back to the original position take your weight on both the elbows first. Slowly bring back and head back to the ground.
Now remove the fists from under the buttock and come to original position.

Benefits and Limitations :-
It improves biceps muscles and muscles of abdomen and back are also made strong.
This is beneficial in diabetes and piles.
It improves digestion.
Those suffering from pain in spine or neck, or having complaint of ulcer in stomach should not practise it.


Ujjayi Pranayama Asana Yoga Postures Step By Step

Ujjayi Pranayama (Victorious breath), which stretches the breath, warms it before entering the lungs, and helps to build heat in the body. Through this heat, the internal Agni or ‘fire' is stoked, and a powerful healing process is unlocked.

Ujjayi Pranayama is sometimes called the ocean sounding breath. Inhalation and exhalation are both done through the nose. The air is taken into the back of the throat with a constriction of the muscles, resulting in a hissing sound - an ocean sound. As the throat passage is narrowed the speed of the air passing through it is increased. This makes the breath long and thin.

Ujjayi (The "loud breathing"): This consists of drawing air in through both nostrils with the glottis held partially closed. Ujjayi translates as "what clears the throat and masters the chest area." This partial closure of the glottis produces a sound like that heard in sobbing, except that it is continuous and unbroken. The sound should have a low but uniform pitch and be pleasant to hear. Friction of air in the nose should be avoided; consequently no nasal sounds will be heard. A prolonged full pause should begin, without any jerking, as soon as inhalation has been completed. Closure of glottis, use of chin lock and closure of both nostrils are standard. Prolong the pause as long as possible; but it should be terminated and exhalation commenced smoothly and slowly. When properly performed, exhalation proceeds slowly and steadily through the left nostril with the glottis partially closed as in inhalation. One may begin to exhale with release of air pressure by lifting the finger from his left nostril, loosening his chin lock and then partially opening his glottis. Exhalation should be complete.

Instructions.
Sit in a comfortable meditative pose or lie in savasana.
Become aware of the natural breathing process and feel the air passing down through the windpipe. Slightly cntract the region at the back of the throat as you do when you swallow.
Inhale and exhale through the nose with the mouth closed.
Make the inhalation and exhalation long, deep and controlled.
Practice full yogic breathing and concentrate on the sound.
Begin practicing for 3 minutes and progressively work your way up to 10 minutes.
Practice as above, but fold the tongue back so that the tip of the tongue presses the back of the soft palate on the roof of the mouth.
As you inhale say “sa” to yourself and as you exhale say “ha.” Repeat ten times.
Inhalation and exhalation should be of equal duration, smooth and relaxed.
Notice your mind wandering as you practice breathing and keep bringing your mind back to the breath.
Focus on the exhalation. Notice where your breath normally stops. Increase the fullness of the exhalation.

Benefits
Calms the mind and the body
The breath becomes a focal point which increase concentration
Meditation practice become easier to concentrate
Stimulates Circulation and metabolism
Increases prana
Increases sense
stimulates olfactory glands
Lungs absorbs oxygen more completely by opening the alveoli in the lungs.


Learn Mayurasana (Peacock posture) Yoga Postures Step By Step

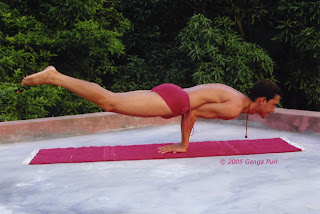
Mayurasana (Peacock posture) :Holding the ground with both the palms, supporting the (corresponding) sides of the navel by both the elbows and raising oneself like a horizontal stick, in the air, this is called Mayurasana.Note:-'Mayur' means Peacock in Sanskrit. One has to hold his whole body like a stick on both his elbows, as shown in the picture. We assume the shape of a Peacock hence it is called Mayurasana.

Steps by Steps
Bend the legs backwards to come to Vajrasana position. Kneel down on the floor, keeping the knees apart. Keeping the elbow joints close to each other, place the palms on the ground in between the knees, fingers pointing inwards towards the feet.
Bend at the elbow joints, support the body at the 'Nadhi' (navel) and place the head down touching the ground.
Stretch the feet back, toes on the ground.
Keeping elbow joints as fulcrum, move forward to raise and balance the body parallel to the ground. Look forward, Fore0arms are slightly inclined to the front. Return to Sthiti.

Benefits:
This posture is very good for the digestive organs. The blood is concentrated and sent to the digestive organs, which also get toned up by the intra-abdominal pressure.
This exercise has a good effect on the expelling action of the colon. It is very beneficial for obesity, piles, and constipation.
It develops the chest.
The exercise is very regenerative and quite stimulating.


Learn Bhadrasana asana Yoga Postures Step By Step

The English translation of the Sanskrit term BHADRA is "throne". BHADRASANA means thus "the posture of the throne". This physical /bodily posture must not be mistaken for BHADRASANA, "the posture of the blessing", which is quite different.

In Bhadrasana, the yoga practitioner will have to assume the posture when he/she will resemble a person who is beneficial. The Sanskrit word ‘Bhadra’ means beneficial.
Steps by Steps
Sit down in an upright position.
The legs will have to be stretched outwards.
Keep both the legs together.
Now pull them inwards.
Bend the knees outwards and bring the feet towards the body.
The soles will have to be joined.
Ensure that the toes and the heels are together.
Now clasp the toes and the forepart of the feet with a firm fingerlock.
Your head and trunk will have to be kept erect.
Bend the elbows outwards.
Bring in the heels bit by bit till they touch the genitals.
During this juncture, widen your thighs.
Allow the knees to gently bend downwards.
Slowly lower the knees to the ground.
Endeavour to further bring in the heels.
Fix the heels on the either sides of the perineum.
Sit erect.
Remain in this position for about 15 seconds.
Breathe normally.
Gradually release the fingerlock.
Again stretch the legs outwards in front.
You are back in the starting position.
Practise this asana once and flow to the Baddha Konasana posture.

ADVANTAGES
Bhadrasana properly maintains the body posture.
Your urinary tract, bladder, the prostrate and the kidneys will function normally.
Tension is released from the spinal coccygeal and sacral regions.
Stiff joints of the ankle, hips and knees are provided elasticity.
The urogenital muscles and ligaments obtain supply of fresh oxygenated blood.
There is a proper distribution of the weight of the flexed knees.
The adductor muscles along the inner thighs gets toned up.
The pelvis and groin muscles are strengthened.


Learn Samasana Asana Yoga Postures Step By Step

Samasana
According to Swami Kuvalayanandaji another name for Guptasana is Samasana. In this posture, body remains in a symmetrical position and, therefore, it is named Samasana The only difference in Samasana and Swastikasana lies in the arrangement of heels, remaining positions are similar. It is a meditative Asana.

How to practice:
Sit erect keeping your supine straight.
Keep your soles between thigh and calf muscles.
Stretch out both your legs together, hands by the side of your body, your palms resting on ground, and your fingers together pointing forward.
Now fold one leg at your knees; put it against the joint of your other thigh.
Fold your other leg; put it near the joint of your other thigh.
Put both your hands on the knees in jnana mudra, a traditional posture of the hand formed with tip of the thumb touching tip of the index finger.
When returning to the original position, first stretch out your right leg.
Then stretch out your left leg and keep both your legs together.

Benefits
Concentration is improved.
Abdominal muscles are toned.
Strain on the heart is reduced.
Functioning of the backbone is improved.


Learn Halasana asana Yoga Postures Step By Step

Yoga posture - HalasanaTranslation: The Plough

Bring the knees into the chest rapidly, raising the pelvis and lower back up. Straighten the legs when the lower back begins to rise.

Take the legs slowly down behind the head and place the hands into the lower back for support.
If possible allow the legs to come all the way down to the mat.

Benefits : Hamstring muscles, back muscles and neck muscles are stretched. If the hands are interlocked behind the back the shoulders will also be stretched. When the hands are stretched over the head little muscles in the spine are stretched

Learn Supta Baddha Konasana Yoga Postures Step By Step

Translation: Supta, in Sanskrit, meants reclining. Baddha means bound and Kona is angle. Asana means pose. Therefore Supta Baddha Konasana means Reclining Bound Angle Pose.


Technique: Passive, supported poses like Supta Baddha Konasana are what are known as "restorative" poses. They allow the body to relax and receive the healing effects of yoga, bring the body back to a relaxed and natural state with less tension. In modern life one has a hard time avoiding stress and avoiding creating muscular tension. Doing restorative yoga is a good antidote. This is a posture that encourages you to to listen quietly to messages the body has to offer.


To practice this posture, you need some way of propping yourself up such as yoga bolsters or an assortment of firm blankets. You should also plan to use a long yoga belt. . When this pose is performed with the body properly supported it can feel delicious and is a panacea for many problems. However, when the body is not properly supported the pose can be uncomfortable. To achieve full benefits one stays in Supta Baddha Konasana for an extended period of time, from 5 to 20 minutes. Use the props to make yourself comfortable for an extended stay. We will explain how.

To get into the reclining version of Baddha Konasana start in the seated Baddha Konasana pose. Sit upright with the soles of your feet together and your knees bent. Bring your feet as close to your torso as possible. In order to find what props your body needs to hold the reclined version of the pose comfortably for some time lower your back and torso to the floor using your hands to support and guide you. Inhale and slide the arms up over your head and rest them on the floor extended above your head.


Benefits: Frees energy flow in pelvic area Increases vitality in digestive organs Good for pregnant women in preparation for childbirth (use bolsters) Quiets the mind Relief from PMS and menopausal symptoms Relief from mild depression Stretches inner thighs and opens groins Can provide great relief for wheelchair bound patients.


Learn Pascimottanasana Asana Yoga Postures Step By Step

The least important part of Pascimottanasana is how deeply forward you can bend. The most important part of this pose is how deeply you can surrender and relax into the forward bend. Even the deepest forward bend should be cooling. If you're doing Pascimottanasana and you're grunting away to pull yourself into position, then it's not Pascimottanasana. You might be bending forward, but you're not forward bending. This asana is not so much a stretch as it is a release.

This pose can be hazardous for the lumbar discs so it is important not to bend forward with a rounded low back. Keep your low back concave as much as possible and your sternum uplifting strongly to maintain the extension of your spine and the length of the front of your torso, which is important in almost all asanas. Pay attention to your hips at the angle between your legs and your lower abdomen (your groins). This is the place to bend from, not your lower back. Of course, the admonition to keep the low back concave and chest expanded in all poses is a guideline. In a deep forward bend, you must round your low back somewhat just as a result of human anatomy.

It is a seated forward bend that stretches the back and spine, shoulders and hamstrings. The name has been drawn from Sanskrit Pascima means back or west and uttana means extension thus literally it means intense stretch of the back or west. It is an excellent posture for abdominal area.

What are the benefits of practicing Pascimottanasana?

1.This asana strengthens the abdominal muscles and helps to cure constipation, dyspepsia and seminal weaknesses.

2. It also removes the possibilities of sciatica.

3. It is highly recommended for women as it benefits the ovaries and uterus and also helps to ease menstrual discomfort. It is also beneficial for kidneys, liver, and diabetes.

What are the cautions?

1. People suffering from chronic constipation should not practice it for more than three minutes daily.

2. If you have ulcer in abdomen then this asana should not be practiced.

3. Do not practice it if you have back problems, asthma or diarrhea.


Learn Viparitakarani-Reverse Posture Yoga Postures Step By Step

The yoga asanas or postures are supposed to give strength, while mudras or gestures are supposed to give balance and steadiness.

According to yoga, within the human body, "The sun dwells at the root of the naval (the solar plexus) and the moon at the root of the palate," In the reverse posture the position is reversed and the sun is raised above the moon.

Technique
Lie on your back. Raise your legs and back, supporting your body by placing your hands under your hips. Make sure your legs are vertical and your toes pointed.

Close your eyes. Breathe slowly and deeply from the abdomen and concentrate on the gonads (sex glands). In the male, these are in the testis, and in the female in the ovaries. Stay in this position for about two minutes.

Benefits and Limitations :-
According to Swami Kuvalayanandaii this Asana maintains the health of thyroid gland.
This Asana is advantageous in semen and testicles problem.
For females, it removes ovary disorder.
This is also useful in dyspepsia, hernia and visceroptosis.
It helps in effective blood circulation in head.
Those suffering from hypertension, cervical spondilitis and operative stage of hernia should not practise it.


Learn Gomukhasana Asana Yoga Postures Step By Step

Gomukhasana -(Cows Mouth Pouse ) it awakens kundalini shakti which enters the mouth of sushm. It stimulate blood circulation making the body energetic and the mind peaceful . this asana curves rheumatic arthritis , constipation , piles etc . it is good for reducing fat on arm , stomach and thighs .

Technique :-
Sit erect stretching both legs together in front, hands by the side, palm resting the ground, fingers of the hands together.

Fold right leg at the knee and place it on the ground by the side of the left buttoock.

Similarly bringing the left leg from above the right leg, place it on the ground by the side of the right buttock. The two soles will remain out towards left and right side.

Place the palms on the knee one above the other and sit erect.

Or place the right palm above the left sole and left palm above the right sole, so that it will resemble the shape of a cow's ear. Gaze in front.

After some time return to the original position. Afterwards practise it by changing the position of the legs i.e. by placing the right knee above the left knee.

Benefit and Limitations :-
The practice of this Asana removes pain in hip and lower extremeties.
This helps in making the spine straight.
This, Asana is very useful in arthritis and piles (dry).
This gives exercise to the lungs automatically.
Those suffering from bleeding piles should not practise it.


Learn Supta-Vajrasana Yoga Postures Step By Step

Supta-Vajrasana is further development of Vajrasana. We lie on our back with folded legs, hence, it is called Supta-Vajrasana.


Technique

Kneel, with the knees together, the feet about 12 inches apart, soles upward, and sit between the feet.


Begin with the spine upright (vajrasana) and then bend backwards until the spine rests on the floor with the arms stretched back.

Retain the position for 2 minutes. Regain the normal position by reversing the process.


Benefits
This stretches the thigh muscles and the abdomen.
The stomach is stimulated.
It strengthens the thighs.
Helps those suffering from constipation.


Caution:
There should never be more than normal pressure on the back, arms, and the ankle joints while doing this exercise.


Learn Vakrasana Asana Yoga Postures Step By Step


This Asana is a simple form of Ardha-Matsyendrasana. Those who are unable to perform Ardha- Matsyendrasana should practise. this Asana. This was first expounded by Swami Kuvalayanandaji.

Steps

1.Keep your legs stretched in the sitting position. Raise the right leg by bending the knee and pull the foot until it rests by the side of your left knee.

2.Place your right hand behind the back without much twist of the trunk. Then bring the left arm over the right knee and hold the right ankle.

3.Push your right knee as far to the left as possible offering good resistance to the left arm.

4.Now exhale and try to twist the trunk to the right side as much as possible taking good support from the left arm, and look towards the right shoulder. This is a complete twist to the right side.

5.Do this asana in the same manner and duration on the left side als

Benefits & Precautions:
A very good exercise to make the spine flexible. It is helpful in treating enlarged and congested liver and inactive kidneys. It brings relief to hypertension, constipation and diabetic patients.